If you've recently kicked the smoking habit and you're just starting out on your vaping journey, you might find it a bit daunting to use a vape device, especially if it's a more advanced setup like a vape mod with a sub-ohm tank or anything more complex than an all-in-one device. But no matter what kind of vape gear you're using, there's one unpleasant experience that most vapers, especially beginners, are likely to encounter at some point – that's the awful taste of burnt vapor, which masks the delightful flavour of your e-juice and leaves you wondering what went wrong. The good news is, whether you're using a pod vape, an all-in-one, a sub-ohm tank and mod setup, or even a rebuildable dripping atomizer (RDA) and mechanical mod, experiencing a burnt taste doesn't signal the end of your vaping journey. So, there's no need to toss that expensive setup in the trash because this article will tell you all about why your vape taste awful and how to fix it.
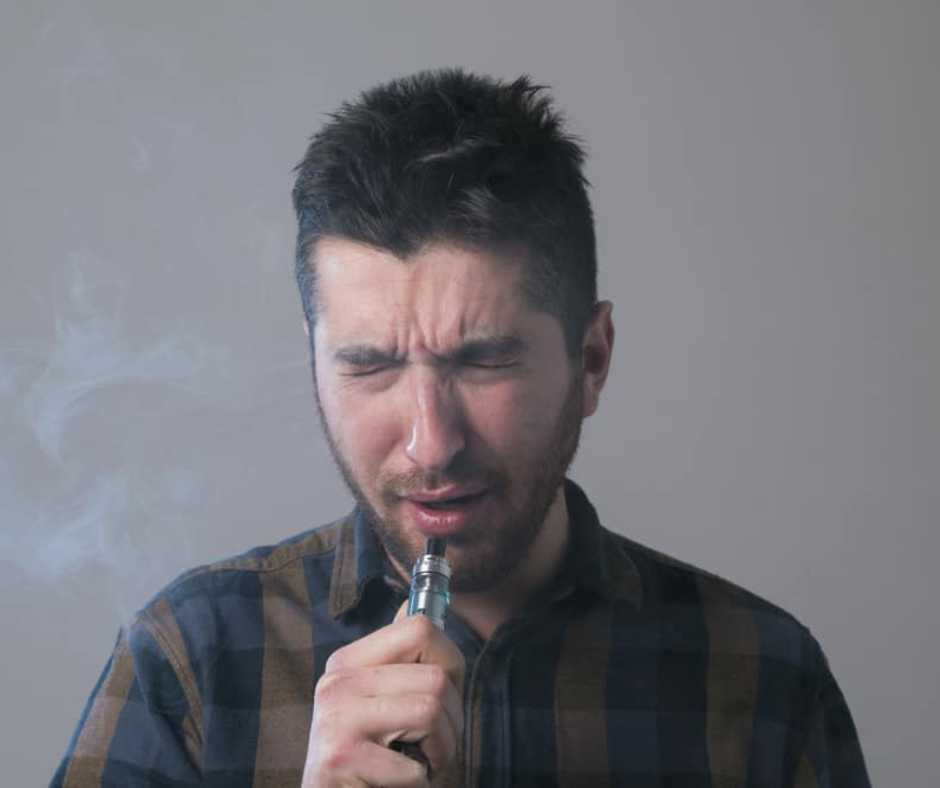
Why Does my Vape Taste Burnt
When it comes to addressing this issue, experienced vapers often attribute it to "burnt coils," but the truth is, your actual coil – the metal heating element inside your vape tank – is most likely not the culprit. Instead, it's the wick, which is typically made of cotton and surrounds the coils, that has likely suffered the burn. I sincerely hope you already have a basic understanding of how your vape tank functions, but if not, here's a brief explanation.

Inside your vape tank, you have a coil made of materials like Stainless Steel (SS), Kanthal (Ka), Nickel (Ni), or Titanium (Ti) wire, or it could be a wire mesh coil. When you press the fire button, this coil heats up. Surrounding this coil, there's an organic cotton wick. In the case of a rebuildable atomizer (RBA), the cotton runs through the coils, while in a regular tank, it wraps around the coils. This cotton has been soaked in e-juice since you primed your coils and filled your tank. Its job is to keep your coils well-moistened, and the e-juice within the cotton closest to your coils heats up to create the tasty vapor that you enjoy inhaling.
As this liquid closest to the coils vaporizes, more e-juice is drawn into the wick, saturating the cotton. This prevents your coils from heating up excessively, as the moisture helps maintain the wire's temperature. However, it's essential to ensure that your tank remains adequately filled for this process to work effectively. New e-juice is pulled into the wick through openings, holes, or slots around the metal casing of your coil head.
There are various reasons why your wicking material might fail to saturate adequately, leading to insufficient moisture to keep your coils from overheating and causing the cotton to burn due to being heated while dry.
How to Get Rid of the Burnt Taste in Your Vape
While most of the solutions provided below primarily aim to prevent a burnt hit, in case you find yourself in this unpleasant situation, there are essentially just two potential remedies. We recommend giving solution "A" a shot first, and only if that proves unsuccessful, consider giving solution "B" a try.
Solution A:
It's possible that giving your coil head a thorough cleaning might help get rid of that burnt taste. Buying new coil heads can be quite costly, so it's a good idea to attempt to rescue your current coil before considering a replacement. While there's a chance that your coil head might be beyond saving, it's worth a shot. I have managed to revive several wicks with a burnt taste by performing a deep clean or, in the case of RBAs, by changing the wick and scrubbing the coil. Just remember to prime, fill, dry hit, and soak (you'll learn how to do this in the following text) before you start vaping again.

Solution B:
If solution "A" didn't do the trick for you, it's time to replace the coil head or coil.
- Begin by unscrewing the top cap and glass to reveal the coil in its housing.
- Unscrew the old coil head from its seat.
- Install a new, fresh one.
- Make sure to prime, fill, dry hit, and soak (further instructions will be provided below).
- You're all set to start vaping.
The Reasons Why Your Vape Taste Burnt
Reason 1: Make sure your coils are primed!
The smart way to prepare for vaping with a fresh coil is to start by opening your tank and priming the coil head. Before you fill the tank, give the wick a few minutes to fully soak up the e-liquid. This process of priming ensures that the wicking and coil material are properly saturated before you start vaping. It's crucial to do this because dry cotton tends to burn, which isn't pleasant at all.
New coils can sometimes be a bit tricky, mainly because the wicking is tight, and the wicking material isn't as spongy until it's been properly used and broken in. This means you should pay a bit more attention to that wick, especially when the coil head is new or hasn't been used for a while, to make sure the e-liquid thoroughly penetrates it.
Without priming, there might be trapped air pockets within the compacted wick, leading to a less-than-enjoyable vaping experience. So, don't skip the priming step if you want to avoid inhaling "unpleasantness."

Solution:
Simple solution, prime your coils! After you've installed your fresh coil, follow these steps:
- Unscrew the top cap and/or glass from your tank base to reveal the new coil head in its place.
- Apply a single drop of e-liquid onto the exposed wick at each of the openings or holes located on the sides of the coil head (these are the wicking ports).
- Drip some e-juice onto the exposed wick from the top of the coil head, ensuring the wick and coil get moist without going overboard – just a few drops will do, you don't want to inhale e-liquid on your first puff.
- Reassemble your tank.
- Fill your vape tank.
- Adjust the airflow to a tight or restricted setting.
- Without turning on your mod (resist the urge to press that fire button!), take a few dry draws to pull liquid into the coils.
- Close the airflow.
- Wait for 5 minutes (for more details, check the section on soaking your wick).
- Refer to the section on high wattages below, and then you're ready to start vaping.
Reason 2: Your vapes wick hasn’t been soak through
Simply priming your coil might not guarantee that the wick is thoroughly soaked, and it's highly likely that if you didn't give your wick ample time to saturate by allowing your vape to sit after filling, you could have begun vaping with dry areas in the wick, leading to that unpleasant burnt taste.

Solution:
- Go through the coil priming steps.
- While the wick is soaking, give the tank a gentle shake and flip it up and down a few times to eliminate any remaining air pockets.
- Keep an eye on the ports around the coil head, and you'll notice air bubbles coming out. Once your wick is completely saturated, these bubbles will cease.
- Refer to the section on high wattages below, and then you're all set to start vaping.
Reason 3: Your vapes wattage is too high
people have one mod they cherish for vaping. Equipped with an expansive touch screen, they often forget to lock it, leading to inadvertent touches that either drop the wattage too low or max it out at the mod's full 218W capacity. This slip-up has unfortunate consequences, causing them to ruin some perfectly good coils and temporarily scorch many others. Fortunately, they manage to salvage the latter with a thorough cleaning.
So, a piece of advice for anyone facing this situation: If you're confident that you've correctly primed and soaked your coils, and your coil head is still within its expected lifespan, there's a reasonable chance that the issue is due to exceeding the recommended wattage for your coil head while vaping. In fact, the first thing to check when experiencing a burnt hit is the mod itself, just to ensure you haven't accidentally cranked up the wattage!

Solution:
When you check your vape packaging or inspect your actual coil head, you'll likely come across a suggested wattage range for your particular vape coil. It's in your best interest to heed this range while you're vaping – it's printed there for a good reason, after all! When we venture into wattage levels that are too high for our coil heads, it leads to a situation where the e-liquid in the wicking (cotton) vaporizes more rapidly than the wick can re-saturate, resulting in the undesirable outcome of burnt, dry cotton.
Especially when we've just put in a new coil or coil head, it's essential to "break it in" following the priming and soaking phase. This involves starting at the lower end of the recommended wattage range, taking 4 to 5 draws, increasing the wattage by 5 watts, and repeating this process until you reach the upper limit of your coil head's range. If you happen to exceed your coil's recommended range, leading to burnt cotton, your primary solutions are the ones mentioned at the start of this article, such as a thorough cleaning or a replacement of the coil and wick.
Here's a useful tip: Just because your coil has a minimum recommended wattage doesn't mean you can't vape it at a lower wattage. To err on the side of caution, commence with a fresh coil at a wattage lower than the minimum recommendation and gradually work your way up from there.
Reason 4: Your vapes tank is not full
Those tiny wicking ports or openings situated around the sides of your coil head should always remain covered. This stands as one of the most fundamental rules in the realm of vaping and a key method to steer clear of the dreaded dry or burnt cotton hits. Repeatedly exposing these ports can significantly reduce the coil head's longevity and its wicking capabilities.
When you take a draw from a tank with exposed ports or one that isn't adequately topped up, you end up pulling air into the wicking instead of e-liquid. The outcome, when you eventually refill the tank (without priming and soaking), is that your initial draws are likely to be on dry cotton.

Solution:
If you've been vaping with an empty tank, it's crucial to prime your coils and refill it. For future reference, always ensure your tank remains adequately filled and avoid letting those wicking ports become exposed.
If you continue to encounter a burnt taste, you might have to consider a thorough cleaning or replacing your coil head and wicking.